INTRODUCTION:
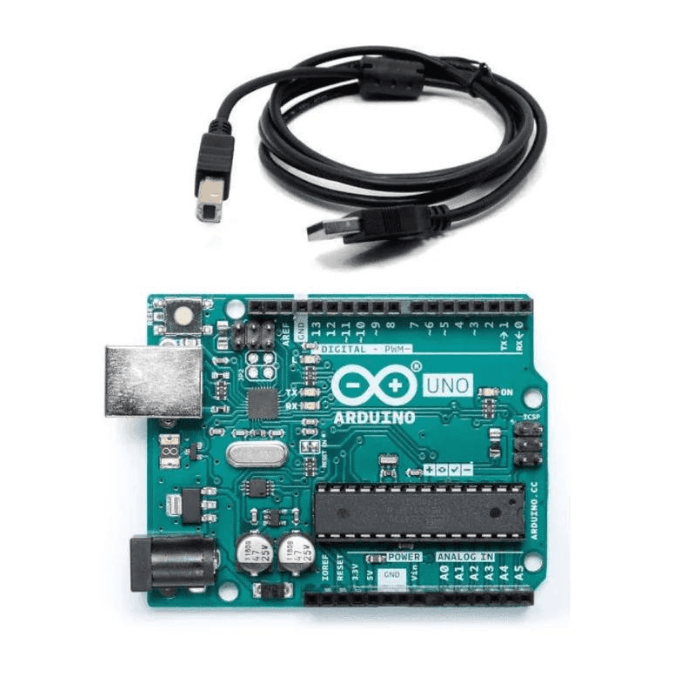
Hey there, fellow Arduino enthusiasts and curious minds! Today, we are about to embark on a fascinating journey into the realm of gas detection using the trusty MQ2 Gas Sensor. If you have ever wondered how to make your Arduino board sniff out different gases, you are in for a treat.
Now, do not worry if you are new to this. We are going to take it step by step, demystifying the process and breaking down the tech talk into plain English. By the end of this blog post, you will be armed with the knowledge and skills to create your very own gas-detecting projects.
But before we dive into the nitty-gritty details, let us chat about what this MQ2 Gas Sensor is all about, its superpowers, and the cool stuff you can do with it. From the basics of gas detection to the magic of Arduino coding, we have got you covered.
So, grab a coffee or your favourite beverage, get comfy, and let us explore the wonderful world of gas detection technology together. No need for fancy jargon here; we will keep it real and accessible. Ready to make your Arduino board your new gas-sniffing sidekick? Awesome, let us get started!
read more : Top 10 Arduino Projects to Get Started With
PROJECT DESCRIPTION:
In this project we are going to see how to interface MQ2 sensor with Arduino in order to detect different gases. Along with a brief description about the MQ2 sensor we have got you covered from the scratch. Along with circuit diagram, working code, code explanation and results, nobody is going to stop you from being an expert in handling MQ2.
So, sit tight and buckle your seat belts as we are onboard for a fun filled journey with a proficient understanding of how things actually work.
read more : Temperature Sensor Interfacing with Arduino
MQ2 GAS SENSOR:
So, have you heard about the MQ2 sensor? It is this cool little gadget, not much bigger than your thumb, that is pretty nifty when it comes to sensing gases and smoke.
It is like your handy-dandy, all-knowing nose in the tech world.MQ2 stands out for its ability to detect gases like methane, carbon monoxide, and even alcohol vapor. It does not just detect them; it gives you the exact measurements, like a pro. It is your personal gas detective. Now, here is the kicker – when the MQ2 sensor sniffs out even a hint of these gases, it does not stay quiet. Nope, it screams out like a smoke alarm, making sure you are on your toes when there's potential trouble in the air.
Read more : Top 10 Robotic Projects for Beginners
The MQ2 is not just about safety; it has got its hands in all sorts of cookie jars. People love it because it is used in gas leak detectors, air quality monitors, and fire detection systems. It is a true multitasker. Now, here is the fun part: this little sensor does not just holler "Gas alert!" and leave you hanging. Nope, it has got this analog output that tells you exactly how much of that gas it is found. So, next time you cross paths with this unassuming little device, remember the magic it packs – the power to sniff out and safeguard, all in a tiny, talkative package.
Read our blog MQ sensor where we explained what is a gas sensor, what is 1ppm equal to, MQ sensor list of different series and their features.
CIRCUIT DIAGRAM:

Connections:
To use the provided code with an MQ-2 gas sensor, you will need to connect the sensor to your Arduino as follows:
MQ-2 Sensor Connections:
VCC (Power): Connect the VCC pin of the MQ-2 sensor module to a 5V output on your Arduino board.
GND (Ground): Connect the GND pin of the MQ-2 sensor module to one of the GND (ground) outputs on your Arduino.
Analog Output: Connect the analog output (AO) pin of the MQ-2 sensor module to analog pin A0 on your Arduino. This is where the sensor will provide its analog readings.
read more : ARDUINO BASED WATER LEVEL MONITORING
Code:
// Define the pins
#define ledPin 6
#define sensorPin A0
void setup() {
// Initialize serial communication
Serial.begin(9600);
// Set the LED pin as an output
pinMode(ledPin, OUTPUT);
// Turn off the LED initially
digitalWrite(ledPin, LOW);
}
void loop() {
// Read and print the analog sensor value
int sensorValue = readSensor();
Serial.print("Analog output: ");
Serial.println(sensorValue);
// Delay for a while
delay(500);
}
// This function reads and processes the sensor data
int readSensor() {
// Read the analog value from the sensor
int sensorValue = analogRead(sensorPin);
// Map the 10-bit data to 8-bit data (0-1023 to 0-255)
int outputValue = map(sensorValue, 0, 1023, 0, 255);
// Control the LED based on the mapped value
if (outputValue > 65)
analogWrite(ledPin, outputValue); // Generate PWM signal
else
digitalWrite(ledPin, LOW);
// Return the analog moisture value
return outputValue;
}
Code Explanation:
Initialization:
It defines constants for pins D6 (ledPin) and A0 (sensorPin).
Initializes serial communication at a baud rate of 9600.
Sets up pin D6 (ledPin) as an output.
Turns off the LED initially.
Main Loop:
Continuously runs the following tasks:
Prints "Analog output: " to the serial monitor.
Reads the analog sensor value from pin A0 using the readSensor function.
Prints the sensor value to the serial monitor.
Adds a 500ms delay before repeating.
readSensor Function:
Reads the analog sensor value from pin A0.
Maps the 10-bit sensor value (0-1023) to an 8-bit value (0-255).
If the mapped value is greater than 65, it uses PWM to control the LED brightness.
If the mapped value is less than or equal to 65, it turns off the LED.
Returns the mapped analog moisture value.
Overall Functionality:
Monitors an analog sensor (e.g., moisture sensor) on pin A0.
Adjusts the brightness of an LED on pin D6 based on the sensor reading.
Higher sensor values result in a brighter LED.
Serially prints the sensor readings to the computer for monitoring.
The LED turns off when the sensor reading is below or equal to 65.
read more : Arduino Sensor types and Applications
Conclusion:
So, in this blog we have clearly understood about MQ2 sensor and its interfacing with Arduino. By meticulously connecting the VCC and GND pins to establish power and grounding, and by seamlessly routing the analog output (AO) from the MQ-2 sensor module to analog pin A0, a functional framework emerges. In this setup, the Arduino effectively processes and visualizes the sensor's data on the serial monitor, simultaneously orchestrating the LED's luminosity through Pulse Width Modulation (PWM) control.
If you appreciate our work don't forget to share this post and leave your opinion in the comment box.
Please do check out other blog posts about Popular electronics
Make sure you check out our wide range of products and collections (we offer some exciting deals!)


