Introduction
In our associated society, GPS (Global Positioning System) technology has become an essential component of daily life. Using the GPS module, we are able to locate ourselves with amazing accuracy for a variety of purposes, such as monitoring our daily exercise. A GPS module along with the Arduino board interface opens up a world of possible uses for both seasoned and beginner electronic students. you will learn about some fantastic projects that use GPS modules in this blog.
Before going to know how to interface the GPS module with the Arduino board, it is important to learn the principles behind the GPS technology and the role of the GPS modules.
GPS Basics:
GPS stands for Global Positioning System, a satellite-based navigation system that provides precise location and time information. A cluster of satellites revolving around the Earth constitutes the Global Positioning System (GPS). These satellites continuously broadcast signals that are received by GPS receivers on the ground.
Each satellite in the GPS constellation broadcasts a signal containing its precise location and a timestamp. GPS receivers, like the ones in your smartphone or dedicated GPS devices, receive signals from multiple satellites simultaneously. By analysing the time, it takes for these signals to travel from the satellites to the receiver, the GPS receiver can calculate its exact location in terms of latitude, longitude, altitude, and time.
read more : Top 10 Arduino Projects to Get Started With
GPS Modules:
GPS modules are compact devices designed to simplify the process of integrating GPS functionality into various projects. These modules typically include the GPS receiver, an antenna, and some processing unit. The processing unit handles tasks such as decoding the satellite signals, calculating the position, and providing this information to an external microcontroller, like an Arduino.
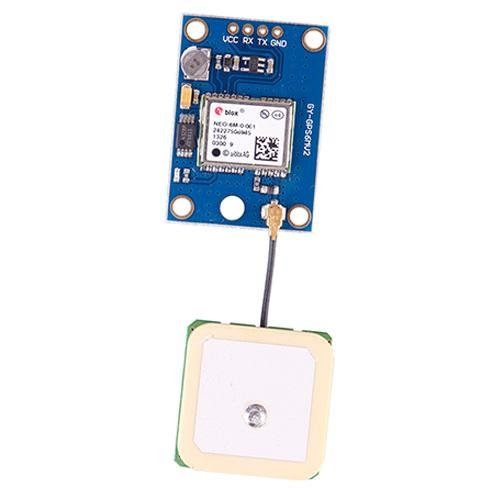
One commonly used GPS module is the NEO-6M, which we will use in this tutorial due to its affordability and popularity among hobbyists.

read more : Arduino Hacks we bet you did not know!
Hardware Requirement:
Let's collect all the necessary components and tools that are required in the interfacing and programming of the GPS module using the Arduino board:
- Arduino Board: Any Arduino board will suffice, but the Arduino Uno is a popular choice for beginners.
- GPS Module: We'll use the NEO-6M GPS module for this blog. Ensure you have a compatible module.
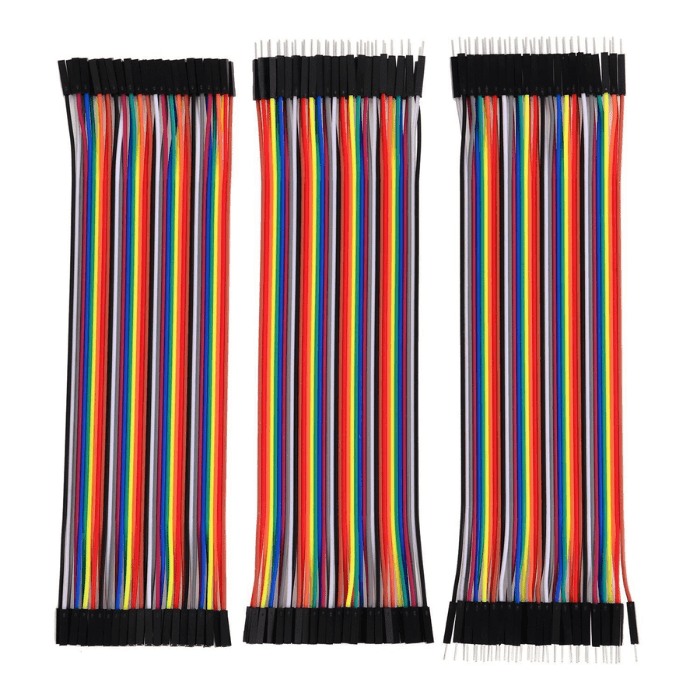
- Breadboard and Jumper Wires: These are essential for connecting the components together.
- USB Cable: You'll need a USB cable to connect your Arduino board to your computer.
read more : Obstacle Avoidance Robot with Ultrasonic Sensors using Arduino
Connection between the GPS Module and the Arduino board
Now, let's connect the NEO-6M GPS module to your Arduino.
Power Supply:
Connect the VCC (Voltage Common Collector) pin on the GPS module to the 5V output on your Arduino. This supplies power to the GPS module. The GND (Ground) pin on the GPS module should be connected to one of the GND pins on your Arduino to establish a common ground reference.
Serial Communication:
GPS modules communicate with the Arduino through serial communication. Connect the TX (Transmit) pin on the GPS module to the RX (Digital pin 2) pin on the Arduino. Similarly, connect the RX pin on the GPS module to the TX (Digital pin 3) pin on the Arduino.
read more : What is the microcontroller used in Arduino UNO?
Antenna:
Connect an active GPS antenna to the antenna connector on the GPS module. The antenna increases the receiving of GPS signals, especially in outdoor environments.

Your wiring should resemble the following configuration:
- GPS VCC to Arduino 5V
- GPS GND to Arduino GND
- GPS TX to Arduino RX (pin 2)
- GPS RX to Arduino TX (pin 3)
- Connect the GPS antenna to the GPS module's antenna connector.
Double-check your connections to ensure they are secure and correctly aligned. Proper wiring is important for reliable communication between the GPS module and the Arduino.
Read our blog IR sensor Arduino code for Interfacing IR Sensor Module with Arduino where we explain Arduino Code and steps in uploading the code to the Arduino board.
Installing the Necessary Libraries:
To communicate effectively with the GPS module, you'll need to install the "TinyGPS" library, a widely used library for parsing GPS data. Here is how we install it:
Open the Arduino IDE.
Navigate to the "Sketch" menu and select "Include Library."
In the dropdown menu, choose "Manage Libraries."
In the Library Manager window, search for "TinyGPS".
Once you locate "TinyGPS" in the list, click the "Install" button.

The library will be downloaded and installed in your Arduino IDE, making it accessible for your GPS project.
read more : Arduino Uno Pin Diagram: A Complete Guide
Program:
With the hardware connections established and the necessary library installed, it's time to write the Arduino code that will enable your Arduino to communicate with the GPS module and parse the location data. We'll provide a basic example to get you started.
#include

#include

TinyGPSPlus gps;

SoftwareSerial ss(2, 3); // RX, TX


void setup() {

Serial.begin(9600); // Initialize serial communication with your computer

ss.begin(9600); // Initialize software serial for communication with the GPS module

}


void loop() {

while (ss.available() > 0) {

if (gps.encode(ss.read())) {

if (gps.location.isValid()) {

Serial.print("Latitude: ");

Serial.println(gps.location.lat(), 6); // Print latitude with 6 decimal places

Serial.print("Longitude: ");

Serial.println(gps.location.lng(), 6); // Print longitude with 6 decimal places

}

}

}

}
Program explanation:
This code initializes the GPS module, reads the GPS data, and prints the latitude and longitude to the serial monitor. Here's a breakdown of the code:
- We include the necessary libraries: "TinyGPS" and "SoftwareSerial".
- We create a “TinyGPSPlus” object named “gps” to handle GPS data parsing.
- We initialize a “SoftwareSerial” object named “ss” to establish serial communication with the GPS module. The pins specified in `ss(2, 3)` correspond to the Arduino pins connected to the GPS module's RX and TX pins.
- In the setup() function, we initialize serial communication with your computer at a baud rate of 9600 and the “ss” object for communication with the GPS module.
- In the loop() function, we continuously check if there are bytes available from the GPS module using “ss.available()”. If there are, we read them and attempt to parse the GPS data using “gps.encode()”.
- If the GPS data is successfully parsed and deemed valid by “gps.location.isValid()”, we print the latitude and longitude to the serial monitor.
read more : Top 10 Robotic Projects for Beginners
Result:
Upload the code to your Arduino using the USB cable and select the appropriate COM port in the Arduino IDE. Open the Serial Monitor by navigating to "Tools" -> "Serial Monitor" and set the baud rate to 9600. Observe the output for latitude and longitude data as the GPS module acquires satellite signals. You can now see the GPS data on the serial monitor.
Advanced Considerations and Applications:
Interfacing a GPS module with an Arduino is just the beginning. Depending on your interests and project goals, there are several advanced considerations and potential applications to explore:
Logging GPS Data:
Instead of displaying data in real time, log it to an SD card for later analysis. Incorporate an SD card module and learn how to save GPS data to a text file. Tracking and documenting the movement of cars or outdoor activities may be done with technology. By logging GPS data, you can analyse patterns, calculate distances travelled, and even create visualisations of routes taken.
Adding Mapping:
Integrate your GPS data with mapping APIs like Google Maps or OpenStreetMap to create custom maps with real-time tracking. With mapping integration, you can not only track your location in real time but also explore the surrounding areas and plan routes accordingly. With the help of this function, navigation is simple and easier for us. Additionally, you may learn more about the geographic distribution of your activities and comprehend your travel patterns by superimposing GPS data on maps.
Geofencing:
Implement geofencing capabilities to trigger actions or alerts when your GPS module enters or leaves predefined geographical areas. For the purpose of safety or location-based marketing, this can be especially helpful. For example, businesses can send targeted advertisements or promotions to users when they enter a specific area. On the other hand, parents can receive alerts when their child enters or exits a predefined boundary, ensuring their safety.
Autonomous Vehicles:
Build a little autonomous automobile using GPS data and other sensors (such as ultrasonic sensors and compass modules) to learn more about the world of autonomous cars. A basic autonomous automobile can navigate its surroundings, identify obstacles, and choose the most effective paths to go to its destination by combining GPS data with other sensors including ultrasonic sensors and compass modules.
Wireless Communication:
Incorporate wireless communication components like Wi-Fi or Bluetooth to show or transfer GPS data on a smartphone app or to broadcast it to other devices. Users may easily access and evaluate their position data due to the real-time tracking and monitoring of the GPS data.
read more : Complete guide to Arduino Pro Mini
Conclusion
Interfacing a GPS module with Arduino is a satisfying attempt that can lead to exciting projects and applications. By understanding the basics of the GPS system, making the necessary hardware connections, and writing the code to analyse GPS data, you have established the foundation for various innovative and fascinating projects.
Whether you want to build a basic position tracker or explore more advanced applications like autonomous cars or geofencing systems, this blog is helpful for you to understand the GPS module and its basics. Therefore, accept your imagination, play with the coding, and keep building projects. Have fun playing with your Arduino projects that support GPS!
If you appreciate our work don't forget to share this post and leave your opinion in the comment box.
Please do check out other blog posts about Popular electronics
Make sure you check out our wide range of products and collections (we offer some exciting deals!)